


Note: This guide is based on the Spec-Driven Development with Coding Agents course by DeepLearning.AI & JetBrains. Written as a companion resource for learners who prefer text over video.
What is Spec-Driven Development?
If you have used AI coding tools before, you have probably experienced vibe coding: you write a prompt, the agent generates something, you look at the result, point out what is wrong, and repeat until it is close enough. It works fine for a button. It falls apart for anything bigger.
The problem is not the agent. The problem is the lack of a contract.
Spec-Driven Development (SDD) is the professional response to this. Instead of describing what you want in a chat message and hoping for the best, you write a specification first — a precise, structured document that defines what you are building and why. The agent then implements from that spec.
The analogy the course uses is apt: you are the architect providing blueprints. The agent is the builder. Builders are fast and skilled, but they need clear drawings. Without them, they guess — and guessing at scale produces technical debt.
>> TLDR; Use this checklist as a reference when starting a new project or feature.
“The agent is the muscle, but the spec is the brain.”
Why It Works Better Than Vibe Coding
Three concrete reasons:
1. You control large changes with small edits. A few sentences in the spec about look and feel might translate to hundreds of lines of CSS. The spec is the lever. The code is the output.
2. Specs survive context window decay. Coding agents have limited working memory. In long sessions, they start making mistakes as their context fills up. A spec persists between sessions and between agents. It anchors the agent to what matters.
3. You get intent fidelity. Specs force you to define the problem, success criteria, constraints, and user flows before the agent writes a single line. The more clearly you define what “done” looks like, the more likely the agent produces code that actually matches your goals.
The SDD Workflow: An Overview
The workflow has three layers:
1. CONSTITUTION  (once, at project start)
   └── mission.md      — why you are building this and for whom
   └── tech-stack.md   — how it will be built
   └── roadmap.md      — what will be built and in what order

2. FEATURE LOOP  (repeating, once per feature)
   └── Plan    — write the feature spec with the agent
   └── Implement — agent builds from the spec
   └── Validate  — you review, test, and accept

3. REPLANNING    (between features)
   └── Update constitution if decisions changed
   └── Revise roadmap
   └── Improve your workflow
Let’s go through each layer in detail.
Layer 1: The Constitution
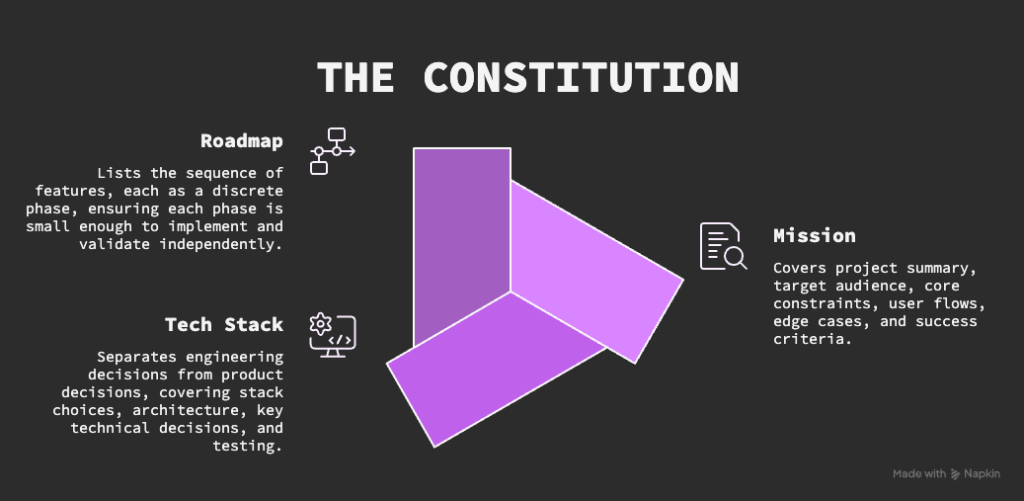
The constitution is written once at the start of the project — and updated whenever key decisions change. It answers three questions:
mission.md — The Why
This is the product vision document. It should cover:
- Project summary — what is this and who is it for?
- Target audience — who uses it, what do they need?
- Core constraints — what is in scope and what is explicitly out of scope?
- User flows — step-by-step: what does the user do?
- Edge cases — what happens in unusual situations?
- Success criteria — how do you know when the product is done?
The mission document is not just for the agent. It is a contract between everyone on the project — including future you!
Practical tip: Write this with the agent, not alone. Ask it to interview you. It will ask good questions you had not considered: architecture patterns, tradeoffs, packages that already solve your problem. Let it draft the document, then review and correct it.
tech-stack.md — The How
This document separates the engineering decisions from the product decisions. It covers:
- Stack choices — languages, frameworks, databases, hosting
- Architecture — how the pieces fit together
- Key technical decisions — the “why this, not that” for important choices
- Testing and CI — how the code will be verified
The tech stack document is for the engineering team — and for the agent in every future session. It prevents the agent from making different technology choices each time you start a new conversation.
roadmap.md — The What
The roadmap is a living document listing the sequence of features, each as a discrete phase. Key principles:
- Each phase should be small enough to implement and validate independently
- Later phases must not break earlier ones
- The roadmap evolves — check it at the end of every feature cycle
The roadmap is your project’s spine. When you return to a project after a break, start here.
Layer 2: The Feature Loop
Every feature follows the same three-step cycle: Plan → Implement → Validate.
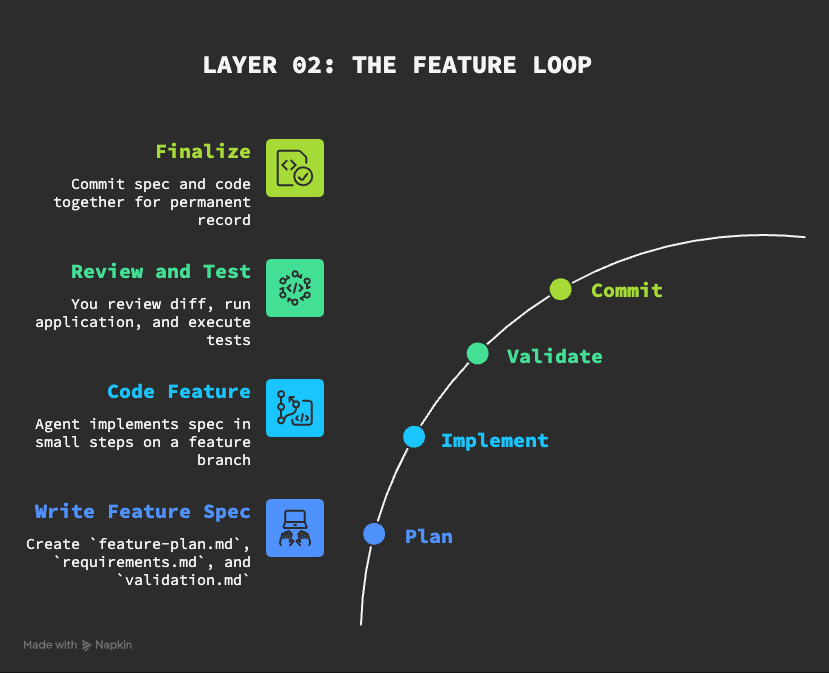
Step 1: Plan — Write the Feature Spec
Before the agent writes any code, you write a spec for the feature. This lives in a dedicated folder, for example features/01-core-game-loop/, and contains three files:
- feature-plan.md A sequenced list of task groups. Each group should be small enough to implement and verify independently. Think of this as the agent’s to-do list, broken into logical chunks.
- requirements.md Explicit, testable requirements. Each requirement should be traceable — you should be able to point to the exact line in the mission or roadmap that it comes from. Use requirement IDs (e.g.
REQ-01) so you can reference them in tests and validation.
- validation.md How you will verify the feature is done correctly. Always include two levels:
- Level 1 — Smoke tests: the minimum checks that must pass before you go deeper
- Level 2 — User flow tests or automated tests: the full verification of the feature
The right level of detail
One of the key skills in SDD is knowing how much to specify. Too little and the agent guesses. Too much and you are micromanaging a capable tool.
A useful heuristic: treat the agent as a highly capable pair programmer. Give it lots of context about goals, constraints, and business rules — the things it cannot know. Give it less about low-level implementation details it can figure out on its own. You would not tell a senior developer which variable names to use.
Writing specs with the agent
You do not write specs alone. Start a conversation, give the agent the roadmap item, and ask it to interview you. Answer its questions. Let it draft the three spec files. Then review them carefully — agents make assumptions to fill gaps, and those assumptions are often wrong in subtle ways.
Always review specs before the agent writes code. A mistake in the spec expands into many mistakes in the code.
Step 2: Implement
Once the spec is approved, tell the agent to implement it. Key practices:
Start with a fresh context. Use /clear or start a new session. The agent should get all the context it needs from the spec files — not from the conversation history. This is the whole point of writing specs down.
Work in a feature branch. Use Git. Each feature gets its own branch. This keeps the spec and code changes together and makes rollback possible.
Work in small steps. Ask the agent to implement one task group at a time and report back. This keeps changes manageable and reduces the cognitive load of reviewing large diffs.
Watch what the agent does. You are the supervisor, not a passive observer. If something looks wrong, say so immediately. It is much easier to correct a wrong turn early than after five more task groups have built on top of it.
Step 3: Validate
Validation is your job, not the agent’s. The agent can help — it can run tests, do a second-look review, or spawn sub-agents to check specific concerns — but you are the one who accepts the work.
Practical validation steps:
- Review the diff — look at every changed file. Focus on high-level concerns: does it match the spec? Does it break anything existing? You do not need to check every variable name.
- Run the application — click through the user flows in your validation doc.
- Run the tests — automated tests should be part of every feature’s definition of done.
- Update the spec if needed — if you find something the spec did not cover, add it. Do not just fix the code. Fix the spec too. Otherwise, the same gap will reappear in the next feature.
- Commit — commit the spec files alongside the code. This creates a permanent record: you can always trace which spec produced which code.
Layer 3: Replanning
After each feature is merged, do not immediately start the next one. Take a step back first.
Replanning is where you:
- Update the constitution if key decisions changed during the feature
- Check the roadmap — does the next item still make sense? Should you reorder things?
- Update your workflow — did you find a better way to write prompts? A validation step you always forget? Automate it.
The course uses a useful phrase here: you have to run slow to run fast. The replanning step feels like overhead. It is actually what prevents the project from drifting.
When replanning, think about scope
If a change is small, do it during replanning. If a change is large — for example, a new requirement from a stakeholder that touches multiple features — schedule it as its own phase on the roadmap. Do not try to fold large scope changes into replanning.
Specs as Living Documents
A common mistake is treating specs as something you write once and forget. In SDD, specs are version-controlled alongside the code. This means:
- When a requirement changes, the spec changes first — then the code
- When a bug reveals a gap in the spec, the spec is updated — not just the code
- The spec at any commit reflects the intent that produced the code at that commit
This is what makes the spec valuable as a long-term artifact. Six months later, when you return to the project, you can read the spec and understand why every decision was made — not just what the code does, but what you were trying to achieve.
Using Agent Skills to Automate Your Workflow
As you repeat the SDD process, you will notice you type the same prompts over and over. “Start a feature spec. Write three files. Interview me. Wait for my answers.”
Agent Skills let you capture these repetitive workflows as reusable packages. A skill is a markdown file that describes a task and its context. You invoke it by name in a prompt, and the agent executes the workflow.
Skills can be:
- Project-scoped — only available in one project
- Global — available across all your projects
You can write skills by hand, or ask the agent to write them for you based on a description of what you want automated.
Applying SDD to Legacy Projects
SDD is often described as a greenfield approach — something you do when starting from scratch. It works just as well for existing projects.
The process is the same, with one difference: instead of writing the constitution from scratch, you ask the agent to reverse-engineer it from the existing code, README files, issue trackers, and documentation.
The agent explores the codebase, reads the existing files, and drafts a mission, tech stack, and roadmap that reflects what has already been built. You review and correct it. Then you proceed with the normal feature loop.
This gives legacy projects an SDD foundation without manual archaeology.
Agent Replaceability
One of the underappreciated benefits of SDD is that your workflow is not tied to any single agent or IDE. Because the spec is the source of truth — not the chat history, not the agent’s memory — you can switch agents at any time.
To make this work cleanly, use open standards:
| Standard | Purpose |
|---|---|
| Agents.MD | Project-level rules for any agent |
| Agent Skills | Reusable workflows, portable across agents |
| MCP | External tool integrations |
| ACP | Connecting agents to editors and clients |
The agent changes. The spec persists.
A PRACTICAL CHECKLIST
Use this as a reference when starting a new project or feature.
Starting a new project
- [ ] Write specs/mission.md with the agent — mission, audience, constraints, flows, edge cases, and success criteria
- [ ] Write specs/tech-stack.md — stack, architecture, key decisions
- [ ] Write specs/roadmap.md phased plan with small, discrete deliverables
- [ ] Commit the constitution before writing any code
Starting a new feature
- [ ] Clear the agent context ( /clear )
- [ ] Create a feature branch in Git
- [ ] Write feature-plan.md, requirements.md and validation.md with the agent
- [ ] Review all three spec files before approving implementation
- [ ] Implement one task group at a time
After implementation
- [ ] Review the diff — high-level, not line-by-line
- [ ] Run the application through the user flows in validation.md
- [ ] Run automated tests
- [ ] Update specs if any gaps were found
- [ ] Commit spec files alongside code
- [ ] Merge the branch
Between features (replanning)
- [ ] Update the constitution if decisions have changed
- [ ] Check the roadmap — is the next item still right?
- [ ] Improve your workflow — automate anything repetitive

TINY CAT
Check the repo for Tiny Cat on Github – a project constructed with Spec-Driven Design during the 7-day challenge proposed by DeepLearning.AI & Jet Brains.
You can also play Tiny Cat here.
Summary
Spec-Driven Development is not a new idea. It is software engineering applied to the context of fast AI coding agents.
The shift it asks of you is real: your job is no longer to write code. Your job is to write clear specifications that a capable agent can implement. That requires a different skill set — thinking clearly about goals, constraints, user flows, and edge cases before anything is built.
The payoff is equally real: code that matches your intent, a permanent record of every decision, and a workflow that scales to large, ongoing projects without accumulating technical debt.
The agent is fast. The spec is what makes that speed useful.
Note: This guide is based on the Spec-Driven Development with Coding Agents course by DeepLearning.AI & JetBrains. While it was written as a companion resource for learners who prefer text over video, it does not replace the course.